Love to use embroidered ribbons, especially on special occasions and events? No doubt, it looks impressive when you see the gifts with ribbons.
Embroidered ribbons are not about wrapping the gifts only. It’s much more than that. You can convey your wishes and affection using the ribbon with elegant embroidery.
However, there are some embroiders who do not find the confidence to show their creativity to the world. Therefore, we are going to talk about embroidery on ribbon using your domestic embroidery machine. We’ll talk about the two most common ribbon varieties, along with their benefits and drawbacks for stitching. Now let’s dive directly into the machine embroidery on the ribbon.
Machine Embroidery On Ribbon
The commercial industry has used machine embroidery on ribbons for a long time. However, it is now gaining popularity among embroiderers, designers, and crafters. You can also efficiently embroider the ribbon if you have a digitized file for embroidery. You can also contact One Dollar Digitizing for premium embroidery digitizing services at the most economical rates. Our experienced digitizers having more than 20 years of experience, can digitize embroidery within a few hours so that you can complete your ribbon embroidery.
After getting the digitized file, now it is the time to look for the different ribbon near you. The best quality ribbon you can find is ideal, but when you have more experience working with ribbons, cheaper craft shop ribbons will also work. Here are some ribbons that can work for you as a beginner.
Grosgrain Ribbon
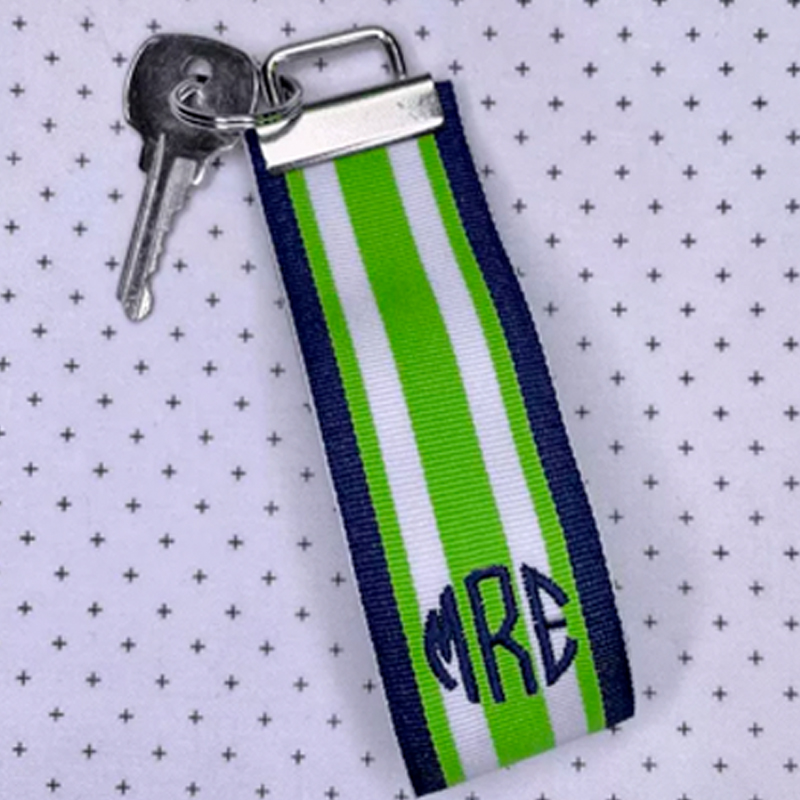
The Grosgrain ribbon is strong and has fewer imperfections. It is a fantastic option to start embroidery. It has been around since the 1500s and is a woven ribbon with different-sized warp and weft threads that create the “lines” across the ribbon.
Acetate Ribbon
Acetate ribbon is a very affordable, coarse alternative to satin ribbon. Although it is fairly rigid and suitable for crafts or gift baskets, it is not comfortable to wear.
Satin Ribbon
Satin ribbon is soft and plush. The process of embroidering ribbon is more challenging and demands more careful planning. It may reveal hooping or stitch tack-down marks if you want to utilize it. (In this article, we’ll only discuss floating with adhesive; however, you could choose to tack your ribbon down.)
Is ribbon suitable for machine embroidery? Absolutely! It does, however, demand greater planning and careful measuring. But after some practice and discovering a strategy that works, you’ll be up and stitching in no time.
How Can you get Machine Embroidered Ribbon?
We’ll start with the ribbon movement, as it’s the most challenging part. Both floating and hooping ribbon have their benefits.
Pro tip: The golden key to the premium embroidery on the ribbon is to measure carefully and secure it well!!
Hooping Ribbon For Machine Embroidery
For extended periods of needlework, many individuals choose to hoop their piece so that it is anchored down. When hooping, you must first fasten the ribbon to the stabilizer. Then, measure the distance from the sides so that the stabilizer and ribbon are straight inside the hoop. Carelessness will result in wavy lines.
This hooping method is simple; lay the ribbon on top of the stabilizer after lightly misting it with a temporary adhesive spray.
Then, using the hoop’s edge as a guide, the entire object is hooped. You can draw a straight guideline or use a straight edge to ensure it isn’t wavy.
In order to use this technique, you need to use a square or rectangular hoop because you will need the edge to serve as a guide.
How To Hoop Ribbon For Embroidery?
The longer, wider ribbon strips work well with this technique. These are the supplies you will require:
- A rectangular or square embroidery hoop
- Medium-weight tearaway stabilizer
- Ruler
- A marking pen
- Short-term adhesive spray
You must center the ribbon in your embroidery hoop before beginning.
Easy Steps To Follow
- Place your stabilizer on your desk, then use the ruler to draw one straight line from right to left.
- Measure your ribbon (we’ll use a 1.5-inch ribbon for this example).
- Divide the ribbon’s width in half; the width should be 34 inches on either side of the middle line.
- Draw a line on the ruler to guide each side of your ribbon.
- Use your centerline to mark two points, each half the height of the hoop, then draw a line for aligning the hoop.
- Spray your stabilizer along the center line sparingly.
- Carefully place your ribbon within the two lines you made as your guideline.
- Using your directions, carefully hoops your ribbon or stabilizer in the hoop. Your ribbon should cover your hoop’s center.
Floating Ribbon
Many people find floating more comfortable, and some planning will also provide fantastic results! The best choice would be to utilize a removable stabilizer (with adhesive on the back or without). Also, you need to use a temporary adhesive spray and either a measuring tool or create a digital guide in your embroidery software.
Floating Ribbon For Machine Embroidery: Step By Step
Most individuals find that embroidering using floating ribbon is simpler. You shouldn’t attempt extensive lines of letters because it is not as secure as hooping, but it is possible. Similar to the hooping approach above, this method also calls for preparation and measuring, and the more you care, the better the outcome.
To sew on the ribbon, adhere to the following instructions:
Place a medium tear away stabilizer piece within a hoop.
- Follow stitching instructions.
- Take the hoop out of the machine and lightly mist the stabilizer between the stitched-on guidelines.
- Position the ribbon between your guidelines and return the hoop to the sewing machine.
- Sew your ribbon on!
Tacky stabilizers have their fans, but there are also drawbacks. To use a sticky back:
- Hoop the stabilizer, and secure the paper inside the area you want to expose with a pin or needle.
- Peel the paper back.
- Sew over the exposed portion with your ribbon. There may be some residue on a sticky back.
You can iron on a stabilizer and embroider when working with a ribbon that won’t be worn as clothes or a hair item. There are a ton of various ways to make the ribbon stronger.
Issues Regarding Embroidering Ribbon
Unfortunately, problems with ribbon embroidery may arise until you figure out what works best for you and your supplies. Life is not always perfect. Here are some illustrations of what you might encounter:
- The needle catching the horizontal weft threads results in wavy edges. You can prevent wavy edges by using a fresh needle and not sewing too quickly. The stronger pull causes more tension.
- A dull needle and excessive speed can also create pulled Stitches. A good steam iron (from the back), pulling it hard while ironing, can remove this.
- Additionally, be careful not to attempt to embroider a letter or object that is excessively large; in that case, you will require an additional stabilizer. Unfortunately, the satin ribbon will cause this; however, good ironing and steaming from the back will help to lessen the appearance of pulled stitches.
- Satin ribbon frequently curls, and the main factor is typically a lack of adhesive. The ribbon compresses where the stitching is because there is insufficient stabilizer. It is not secured, which leaves a curling edge. Change to hoops if your stitching line is longer.
Conclusion
Ribbon embroidery is fun and creative for those who know exactly how to embroider ribbon using the embroidery machine. We are sure that you must be able to embroider the ribbons beautifully after understanding all these steps. As ribbon embroidery is a skill, you should start with small and low-cost supplies before going for the larger project.
Now that you’re moving along let’s review some important ideas for you to keep in mind:
- Be sure to measure correctly!
- Take your time
- Keep adherence
These fundamental suggestions can help you to achieve straight embroidered names and soft and delicate stitch-outs. You could feel irritated when you first start doing ribbon embroidery, but practice and time will help you progress. Continue practice until you start doing happy embroidery!