Embroidery patches are something that seeks attention rapidly without the fact that customers want to buy them or not. That’s why it is gaining huge popularity and widespread usage. You must have an idea about the embroidery patch if you are in the embroidery industry.
However, if you are looking to make embroidery patches and customize them with your creativity, here is a complete guide. Give this blog a read and explore the easiest way to make these patches for embroidery quickly.
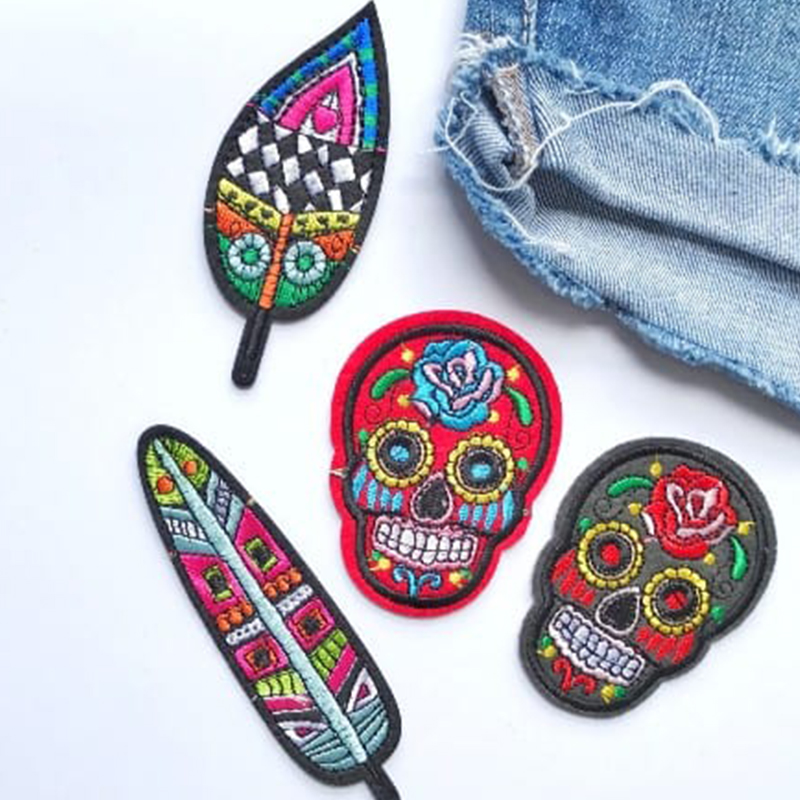
What Is An Embroidery Patch?
A creative method to introduce a piece of yourself to the world is via embroidery patches. They are simple to paste into a hat, bag, or garment. A unique method to express your hobbies and modestly promote your stitching skills is custom embroidered patches.
In addition to being a creative way to express your individuality, embroidered patches are also adaptable and small enough to be sewn onto any outfit.
We’ve mentioned two new techniques to make premium embroidery patches if you want excellent results!
2 Simple Techniques To Make Embroidery Patches
The two simple ways to customize your patches are the DIY and ready-made embroidery patches.
1. Simple DIY Embroidery Patches
The patch outlines of these skillfully scanned embroidery patterns may be customized with your artwork and text. These designs enable you to quickly and simply produce personalized patches using any materials of your choice. Whether you desire to create a solitary patch on a machine with one needle or multiple patches on a machine with multiple needles.
In order to appropriately personalize your patches, you may utilize a range of different shapes, materials, and colors with the aid of new DIY Patches design files.
These DIY embroidery design files copy the polished appearance of commercial borders, which are produced using a specific machine. You will get neat and tidy patches at the end.
The patch outlines of these skillfully scanned embroidery patterns may be customized with your artwork or text. You may quickly make unique patches from whatever pieces of fabric you like by pressing a button!
Easy DIY Embroidery Patches Method
1-Get Your Patch Ready
The preparation of your patch is crucial. You are free to use any fabric, including cotton, felt, and poly.
To provide additional stability and ensure that your patches lie flat and have a firm, genuine patch feel, incorporate buckram.
You must use one of these stabilizers to support your patches. Just keep in mind that any method you choose will change how you use the following steps:
- A product having no-show mesh (fusible interfacing on one side) or
- A two-sided fusible (like a sticky patch fusible Stabilizer)
Using a home iron or a heat press set at 260°F for around 12 seconds is a simple way to apply the Stabilizer.
- To prevent sticking when using a no show mesh stabilizer product, use a Teflon sheet beneath it. After that, line up your fabric and no-show mesh fusible so that the shiny side is at the bottom. Next, place a second Teflon sheet on top. The fabric sandwiched between sticky patch fusible will be placed between the two Teflon sheets.
- When using a tacky patch fusible Stabilizer, it’s practically the same thing: place it under the heat press for 12 seconds. Lay the sticky patch on top of the fabric, add a piece of Teflon on top, arrange everything in a straight line, and then lay everything under the heat press for 12 seconds. After that, hoops it or cut it to your liking for a tacky patch.
We strongly advise utilizing tacky patch fusible when creating patches for a variety of reasons:
- It has a double adhesive, so it adheres to one side and becomes sticky when you lay it down. As a result, “spray adhesives” are not used while creating patches.
- Employing a tacky patch fusible will offer your patches greater stability than merely a no-show mesh product.
- The opposite side includes a sheet of released paper that is ideal for use with your plotter.
This kind of preparation will give your patch a backing to minimize fraying. There won’t be any fraying on the edges after it’s been bonded to the real cloth and cut, putting you one step closer to making that ideal patch.
2-Cutting Your Patch Pattern
If you have a cutting machine, it will determine how you handle this following stage.
Using A Cutting Machine
Put your stabilized fabric onto your matt and enter your patch SVG file into your cutter. Let your patch cutter machine cut out the ideal shapes for you.
- If you don’t have a cutter machine, you can sew your fabric and Stabilizer using the stitch file you got with your DIY Patch pattern file. Cut along the stitch outline after completion. Don’t leave any stitch outline hanging out; cut right on it. Its dimensions are such that they completely suit the patch’s design files.
3-Adhesive Backing
How well your patch adheres will depend on the Stabilizer you use.
- To secure the embroidered patch in place, spray adhesive (such as 505) on the patch’s back if you have used the no-show mesh stabilizer.
- If you use a tacky patch stabilizer, you can simply peel off the backing and reveal the adhesive, leaving you with a sticky back.
4- Sewing Your Patch Embroidery
You can use the three distinct stabilizer kinds while embroidering your patch, with one having a stronger benefit than the others.
The methods you’ll employ may vary depending on the Stabilizer you choose for your customized embroidered patches. You may select from the following options:
- Homemade Tear Away Patches
- Homemade Wash Away Patches
- Prepare Patch Film
Homemade Tear Away Patches
Follow these instructions when using tear away Stabilizer for your homemade patches.
- Use a tear-away stabilizer hoop.
- Execute the placement stitch.
- Attach the patch.
- If you have used that one, spray 505 or KK to make the no-show mesh fusible adhere.
- If you use a tacky patch to reveal the sticky side, peel off the paper covering it.
- Ensure that your form is correctly aligned with the stitched outline. Reattach the hoop to your machine, and it will do a double run stitch, going around twice for strength.
- If you wish to use mylar, do so at this stage and attach it using painter’s tape (remember to reduce the stitch density of your pattern when using mylar!).
- In your Hatch, Wilcom digitizing software (or any embroidery software), you may alter the lettering for your patches.
- Finish stitching your design.
- Take off your hoops. By using a tear away, your design will start to come free. Some little fluffies are left on the exterior of the patch when you peel it off. You can burn off part of the extra Stabilizer using a soldering iron.
Wash Away Patches
Washing away the Stabilizer will significantly enhance your results.
Follow these instructions when applying a wash away Stabilizer to your homemade patches.
- Hoop your wash-away Stabilizer.
- Run placement stitch.
- Stick your patch down.
- Spray 505 or KK to make the no-show mesh fusible adhere if you used one.
- If you used a tacky patch, peel off the paper to reveal the adhesive side.
- Make sure your shape is precisely aligned with the stitched outline.
- Reattach the hoop to your machine, and it will sew a double run stitch (a thread that goes around twice for strength) before finishing the outside with a zigzag stitch.
- Mylar can be added at this point and secured using painter’s tape; remember to reduce the stitch density.
- ESA fonts (or other embroidery software, of course) can be used if you have Hatch software to personalize the lettering for your patches.
- Finish stitching your embroidered patch design.
- Take away your hoops. Cut near to the patch’s edge, dip your fingers in water, then rub the patch’s exterior to melt away the extra Stabilizer. This will produce cleaner results with better quality.
Prep Patch Film
Follow these instructions when utilizing prep patch film for your DIY patches.
- Hoop your prep patch film. It has a smooth side and a rough side. The rough side should face downward, while the soft side should be hooped upward.
- Execute the placement stitch. Spray 505 or KK to make your patch adhere if you used a no-show mesh fusible.
- If you used a tacky patch to reveal the sticky side, peel off the paper backing.
- Ensure that your form is properly aligned with the stitched outline.
- If you intend to utilize mylar, include it at this stage and fasten it with painter’s tape (remember to decrease the number of stitches per inch when using mylar!)
- Reattach the hoop to your machine, and it will execute a dual run stitch, circling twice for durability, followed by a zigzag stitch to complete the outer edge. You may alter the lettering for your patches in any embroidery digitizing software you have.
- Finish stitching your design.
- Take away your hoops. Just remove the film from the patch to get a flawless, completed edge. Of the three possibilities, prep patch film is the safest if you seek our recommendations.
5- Sealing The Post Patch
You’re almost finished! You should use a post-patch iron-on seal to fix your patch.
For a neat, professional finish, a post-patch iron-on seal is a double-sided, heat-activated seal put to the reverse of your final patch. On the unfinished side, it will conceal all your leaps and trims and polish your patch.
Cut a portion of the post-patch iron-on seal to the appropriate size for your patch to use it. In between two pieces of Teflon, place the post-patch seal on top of your patch. Place it beneath your heated press or flat iron for a duration of 15 seconds at a temperature of 380°F.
Remove the top piece of Teflon and give it a moment to cool. Make sure it’s not too hot when you peel it off; otherwise, you’ll have residue on the Teflon below.
Peel the post-patch seal off after it has cooled a little, and take off the patch’s outside exposed seal while it is still heated. Remove the paper portion of the post-patch seal from the design by peeling it off (you may need tweezers for the little bits leftovers behind).
Peel the post-patch seal off after it has cooled a little and remove the patch’s outside exposed seal while it is still heated. Remove the paper portion of the post-patch seal from the design by peeling it off (you may need tweezers for the little bits left behind).
Now that the back is clean, your DIY patch looks polished.
2-Patches With Ready Made Embroidery
Ready made embroidery patches are designed to help you save time and get the best outcomes possible. The patches are all prepared for embroidery. These are the real stuff, produced to commercial standards with actual merrowedTM borders.
Simple hoop the patch, enter your logo or letters into our “perfect placement” embroidered files, and press start.
Having a finished patch with an already complete border immediately enhances your productivity and cuts production time by at least 3000 stitches.
Steps For Ready Made Embroidery Patches
Here are the steps to consider for the ready made embroidery patches.
1-Peeling Of Stabilizer
When using the pre-made patches, peeling away Stabilizer is advised.
2-Sew Your positioning Stitch In Place
Run a line across the area where you want to apply your ready-made patch.
3-Adhesive Backing
Your ready-made embroidery patch should have some adhesive spray applied to the back. Reattach the hoop to your device and place it into the designated stitch.
4-Blanket Stitch
Your pre-made patch will be held in place with a minimal number of stitches by a loose blanket stitch that is run over the top of it. When you run your custom embroidered pattern inside, your patch will be safe.
5- Use Scissors To Cut Off The Blanket Stitch From The Back
Turn your hoop upside down after removing it. Using scissors to cut the blanket stitch, it will come out in one piece.
Step 6: Sealing The Post-Patch
Remove the patch from the Stabilizer and use the post-patch iron-on seal to create a clean backing and professional appearance. Cut a tiny slit into the post-patch iron-on back for an easy starting point once it has been fused. Then heat your iron or heat plate to 380°F and set beneath for 15 seconds.
It takes much less time to finish your patch.
If you are stuck at the digitizing point, then stop stressing!
One Dollar Digitizing offers the best embroidery digitizing services in the town. Having 20-plus years of experience in the digitizing market, you can trust us without fearing money loss. We offer embroidered logo digitizing at an economical rate. These are not made using automated software that produces average results; each file is hand digitized and tested.
So, contact us to show your innovative embroidery patch ideas to the real world.